Want to enhance your home with radiant floor heating but don’t know where to start?
As veteran floor heating specialists, we are here to help you out.
From initial planning to how to install heated floors, we’ll provide you with all the knowledge you need to transform your cold floors into cozy, warm surfaces.
Ready? Let’s dive into our step-by-step guide.
1. Decide On Your Flooring

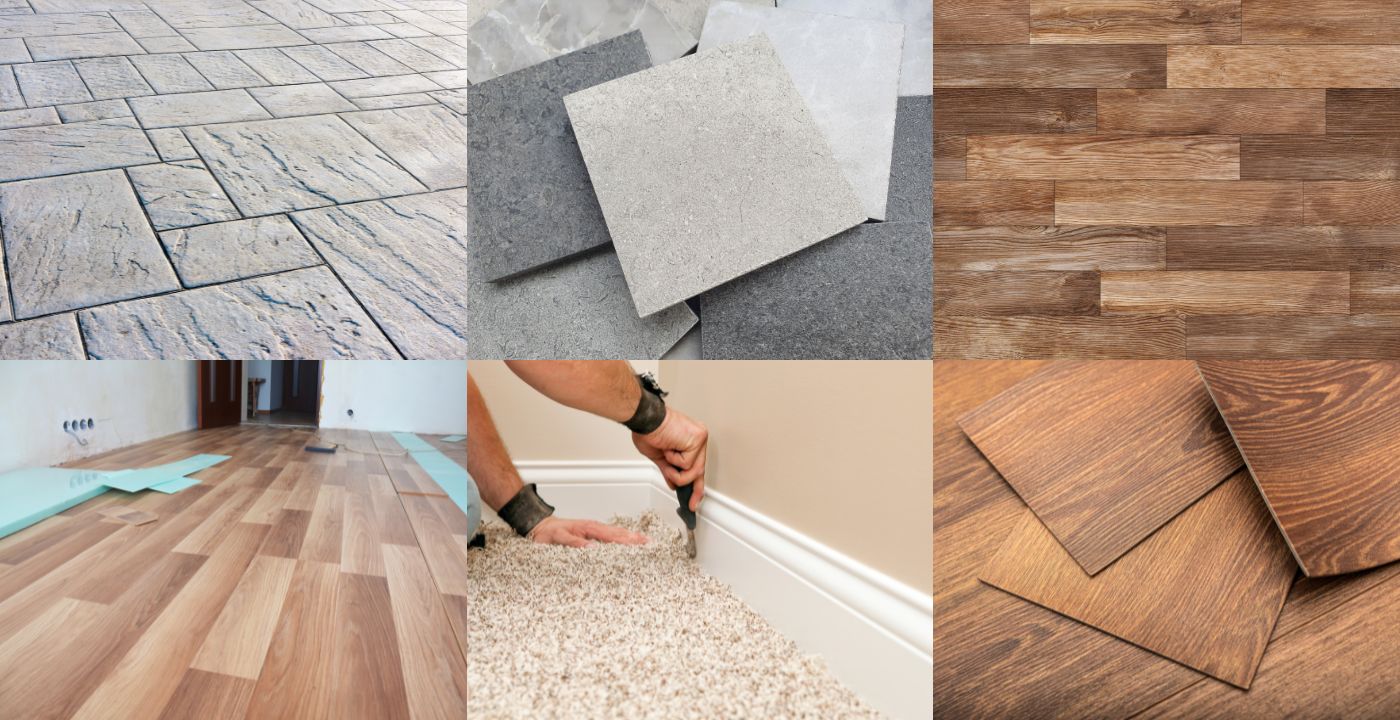
Before installing underfloor heating, you need to consider what’s on top. If you are retrofitting, then your existing floor surface may play a significant role in determining which radiant floor heating option you should choose.
If you are building a new home or tackling a major renovation, the list below can help you choose the ideal material for your preferred floor heating system:
Tile and Stone
These materials have high thermal conductivity, making them an efficient option for underfloor heating systems. They heat up quickly and distribute warmth evenly across your floor while retaining heat for longer.
Tile and stone are also durable and moisture-resistant, ideal for high-traffic spaces and humid areas like bathrooms and kitchens.
On the downside, these surfaces can be cold when your heating system is turned off, and installation costs are higher as they need professional handling and special adhesives.
Concrete
Concrete has excellent thermal mass to absorb and distribute heat. It’s also a good warmth conductor, which can help reduce energy consumption in radiant heating systems and keep them efficient.
It withstands the temperature changes associated with radiant heating without cracking or warping and is easy to embed directly into concrete during pouring.
Hardwood
The natural warmth and beauty of hardwood floors make them a popular choice for many homeowners considering radiant floor heating installation. You can opt for solid wood although engineered wood is more stable and better suited for underfloor heating.
Warping can occur as hardwood expands and contracts with temperature changes. To avoid this, it’s best to use a professional installer.
Laminate
If you’re keen on wood but it doesn’t suit your budget, you can achieve a similar look using laminate flooring. It’s cheaper and less likely to expand and contract, offering more stability than wooden floors.
As this material is sensitive to water damage, we don’t recommend using it in areas such as your bathroom.
High heat can also have negative effects, so it’s important to follow manufacturer guidelines when installing laminate flooring.
Carpet
The texture of carpets is naturally soft and warm underfoot. You can enhance this feeling with underfloor heating if the correct type of carpet and underlay are selected.
We recommend using a low-tog carpet that doesn’t insulate against heat, as this reduces the efficiency of your heating system.
Carefully consider your carpet type to ensure there’s no risk of overheating and damage.
Vinyl
Vinyl is affordable, easy to install and available in various styles. Not all vinyl is compatible with floor heating systems, so check this before purchasing.
In addition, vinyl can discolor or give off an odor when hot. Its low maximum temperature tolerance also limits its use in high heat-loss areas.
2. Choose Your Heated Floor System
Now that you know more about your floor’s compatibility with radiant heating installation, it’s time to choose your system – electric or hydronic.
Both systems have unique benefits for in-floor heating installation, so let’s look at each type.
Electric Heated Floors

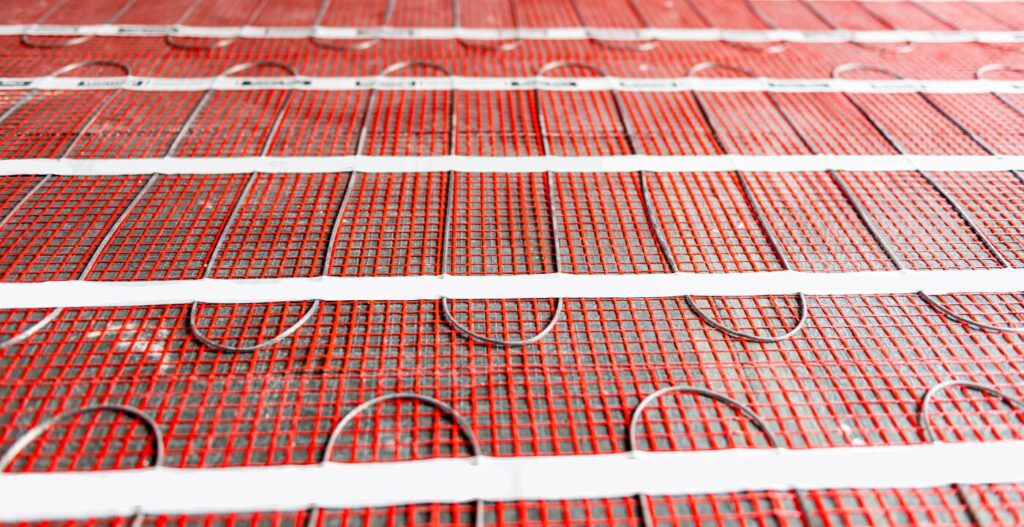
Electric systems use cables or mats with heating elements, making them perfect for smaller spaces like bathrooms and kitchens.
What’s great about electric systems?
- Simplified installation
- Lower upfront costs
- Heat up quickly, giving you instant warmth
- Need very little maintenance
- Ideal for remodels as they add minimal height to your floor
But keep in mind:
- Higher operating costs, especially if electricity rates are steep in your area
- Not as cost-effective for heating large areas or entire homes
Hydronic Heated Floors

Hydronic systems use hot water pumped through flexible tubing to warm your floors. While more complex to install, they’re great for heating larger areas or entire homes.
The upsides of hydronic systems:
- Energy efficiency, especially for large spaces
- Lower long-term operating costs
- Even and consistent heat distribution
- Compatible with various heat sources, offering flexibility
However, consider these factors:
- Higher initial installation costs
- Complex installation process, best done by professionals
- Could add more height to your floor and require space for components like boilers
- Periodic maintenance of the boiler and other parts is necessary
Ready To Transform Your Cold Floors Into Cozy Havens?
So Which Radiant Floor Heating System Is Right For Your Home?
| Type | Electric Floor Heating | Hydronic Floor Heating |
|---|---|---|
| Best For | Small areas, instant heat, retrofitting | New builds, whole-house heating, long-term savings |
| Installation | Simple to moderate | Moderate to complex (Professional recommended) |
| Cost | Lower upfront outlay | Higher initial investment |
| Main materials | Heating cables or mats, thermostat, insulation boards | Boiler or water heater, pump, manifold with valves, tubing, thermostat and control system |
3. Planning and Designing Your Heated Floor
Your next step is understanding how to install radiant floor heating.
Homeowners who know their way around a tool kit sometimes tackle this process themselves, but things can get complicated. When in doubt or to avoid costly mistakes, it’s best to request a professional to install your heated floor.
Whether going DIY or professional, these are the planning and design steps to follow:
Determine Your Heating Needs
What is your purpose? Decide if you want your heated floor to be the main heat source, work alongside other heating systems, or simply add comfort underfoot.
Consider your environment. Think about typical outdoor temperatures, how well-insulated your space is, and the size of the room.
Don’t forget that unique spaces like sunrooms and garages might need a different approach.
Do Your Calculations
Carry out a heat loss assessment. This determines how much heat escapes from a room. Factors to consider include:
- Wall, floor, and ceiling insulation quality
- Number and size of windows and doors
- Ceiling height
- External wall exposure
- Room usage (a bathroom may need more heat than a bedroom)
- Floor coverings
Design for Even Warmth
When considering how to install underfloor heating, it’s important to design the spacing between heating elements to avoid cold spots.
Electric systems typically range from 2-8 inches depending on the floor type. For hydronic systems, tubing is spaced between 6-16 inches apart.
Again, this is where professional installers can come in handy. They have the expertise and electrical knowledge to fit your heating elements safely, without risk of damage or safety hazards.
Create Your Blueprint
This is really where an expert floor heating company can assist you with specialized software to draw up a detailed plan perfectly fitting your home’s layout. And, you can rest assured your heating system meets all the necessary technical requirements.
We offer design assistance using AutoCAD and other tools to tailor your heating system to your needs.
4. Prepare Your Subfloor
After completing your design plans it’s time to get to work by preparing your subfloor for the heating elements.
Clean, Fill, Inspect
Begin with a thorough cleaning using a stiff broom and vacuum. Fill cracks or holes with an appropriate filler and inspect for protruding nails, staples, or splinters.
A spick and span subfloor ensures small debris can’t create pressure points that might damage your heating elements over time. It also allows for better adhesion of your insulation and flooring materials.
Pick the Appropriate Insulation
Select boards designed for underfloor heating (typically foam-based with a reflective layer). The U.S. Department of Energy recommends R-11 (3½”) insulation for homes in warmer climates and R-25 (6″ to 8″) insulation for cold zones.
Measure and cut your insulation boards to fit snugly, leaving no gaps. If the area is damp, consider a moisture barrier before the insulation.
You’re now ready to secure the boards using adhesive or mechanical fasteners. Finally, seal the seams with foil tape on the joints between boards to create a continuous insulation layer.
5. Install Your Heating System
If you’ve gone for electric floor heating installation, follow these steps:
- Follow your planned layout to position the heating mats or cables.
- Secure everything in place using double-sided tape, hot glue, or staples – whichever works best for your setup.
- Install your thermostat sensor between the heating elements to keep tabs on your floor temperature. If you’re going DIY you should have basic knowledge of flooring, some plumbing skills and electrical basics.
To tackle a hydronic system installation:
- Set up your command center and install the manifold in an easily accessible spot. This device sends hot water through all the tubes in your floor. As this is a complex task, we strongly recommend seeking professional advice.
- Carefully lay out the tubing across your subfloor. Use gentle curves rather than sharp turns for optimal water flow and clip the tubing in place.
6. Bring Your Heated Floor to Life
If there’s a problem with your system, now’s the time to find out as you check your thermostat and controls. Use a digital multimeter to perform a resistance test on your heating elements before covering them up.
While it might be tempting to DIY, it’s advisable to bring in a licensed electrician for this part. They’ll ensure all the connections are safe and up to code, giving you peace of mind.
7. Cover the Heating Elements
The hard work is done. You can now cover your heating elements with your chosen flooring.
If going with tile, start by spreading a layer of polymer-modified thin-set over your heating elements.
For wood, carpet or laminate, use a self-leveling compound. Simply pour it over your heating elements and it will smooth itself out for an even foundation.
8. Finishing Touches
Run another quick test of your floor heating system and double-check that everything’s working as it should. Finish by setting up your thermostat for optimal comfort and efficiency.
You can, for example, set a schedule that aligns with your daily routine so your floors warm just before you wake up. Using night setback will slightly lower temperatures when you are sleeping, while vacation mode saves energy when you’re away.
Electrical Requirements for In-Floor Heating
If you’re wondering if you need an electrician to install heated floors, the answer is probably yes.
This is because most electric in-floor heating systems need a dedicated circuit for sufficient power and to prevent overloads.
Depending on the size of the system, you may need a circuit breaker rated between 15 to 30 amps as well as ground fault protection. You also should use the appropriate gauge wire to handle the current load of your heating system.
All this takes specialized electrical knowledge to prevent short circuits, overloads, and even fire hazards.
Frequently Asked Questions
How much does it cost to install heated floors?
The cost of installing radiant floor heating typically ranges between $8-$12 per sq. ft for new constructions. If you’re retrofitting, expect to pay between $8-$20 per sq. ft. due to additional labor and material needs.
How do I install heated floors in a bathroom?
To install heated floors in a bathroom, it’s essential to begin with proper insulation as comprehensive waterproofing helps prevent electrical faults and safety hazards. Once your insulation is laid secure your heating elements to the subfloor and cover them with mortar before tiling.
Take the Next Step
There’s no doubt when you install heated floors your living space is transformed offering warmth and comfort throughout the year. Proper planning is key if you’re trying DIY as mistakes can be expensive to fix.
If you prefer to sit back and let the professionals overhaul your floor, we’re here to help. Our expert services range from sales and design professionals to project management and support. Get in touch and let us assist you every step of the way.


